
Step 1: Select Target(s) to Scan
on ‘New Scan’ button on the top right hand of the Acunetix WVS user
interface.
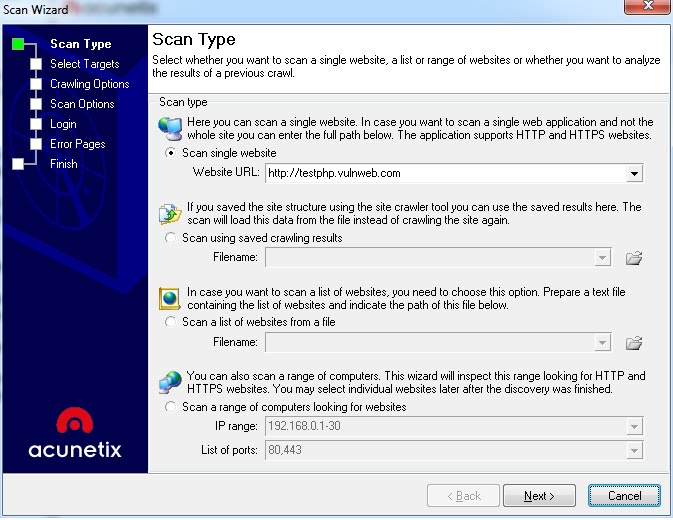
Screenshot 8 – Scan Wizard Select Scan Type
2. Specify the website(s) to be scanned. The scan target options are:
· Scan single website - Scans a single website. Enter a URL, e.g.
http://testphp.vulnweb.com.
· Scan using saved crawling results - If you previously performed a
crawl on a website and saved the results, you can launch a scan against
the saved crawl, instead of having to crawl the website again.
· Scan List of Websites - Scans a list of target websites specified in a
plain text file (one target per line). Every target in the file is to be specified
in the format
default port. The maximum number of websites Acunetix WVS can scan
at one time is between 20 and 30 sites; depending on the size of the
websites.
· Scan Range of Computers - This will scan a specific range of IP's (e.g.
192.168.0.10-192.168.0.200) and port range (80,443) for available target
sites. Port numbers are configurable.
3. Click 'Next' to continue.
Step 2: Confirm Targets and Technologies Detected

Screenshot 9 – Scan Wizard Selecting Targets and Technologies
Acunetix WVS will automatically fingerprint the target website(s) for basic
details such as operating system, web server, web server technologies and
whether a custom 404 error page is being used (For more details on Custom
404 Error Pages refer to page Error! Bookmark not defined. of this
manual).
The web vulnerability scanner will optimize the scan for the selected
technologies by reducing the number of tests performed. E.g. Acunetix WVS
will not launch IIS security checks against a Linux system. This will reduce
scanning time.
Click on the relevant field and change the settings from the provided check
boxes if you would like to add or remove scans for specific technologies.
Note: if a specific web technology is not listed under 'Optimize for the
following technologies', it means that there are no specific tests for it.

In this dialog you can configure the website crawling options. The Crawler
traverses the entire website and identifies its structure and parameters. You
can configure one or more crawling options. For your first scan, you can use
the default crawling options. For more information refer to
Note: If the scan is being launched from a saved crawl result, these options
will be greyed out because the crawling options used for the original crawl will
be retained.

In this dialog you can configure the scanning profile and scan options.
Scanning Profile
The Scanning Profile will determine which tests are to be launched against
the target website. For example, if you only want to test your website(s) for
SQL injection, select the profile sql_injection. No additional tests will be
performed.
Refer to the ‘Scanning Profiles’ section on page Error! Bookmark not
defined. for more information on how to customize existing scanning profiles
or create new scanning profiles.
· HTTP Authentication - This type of authentication is handled by the web
server, where the user is prompted with a password dialog.
· Forms Authentication - This type of authentication is handled via a web
form and not via HTTP. The credentials are sent to the server for
validation by a custom script.

Download link is below.::::
-----------------------------


0 comments:
Post a Comment